The Athelas Patient Portal lets patients sign in securely to view appointments, exchange messages with the practice, manage payments and saved cards, complete forms, and access home exercise content.Patients can register for the portal either through patient-specific invitation links (email and/or SMS) or through a self-service registration link hosted on the practice’s site.
You can invite patients to the portal from two places: Outreach Flows and the Patient Responsibility page. Patients can also register themselves through a self-service link.
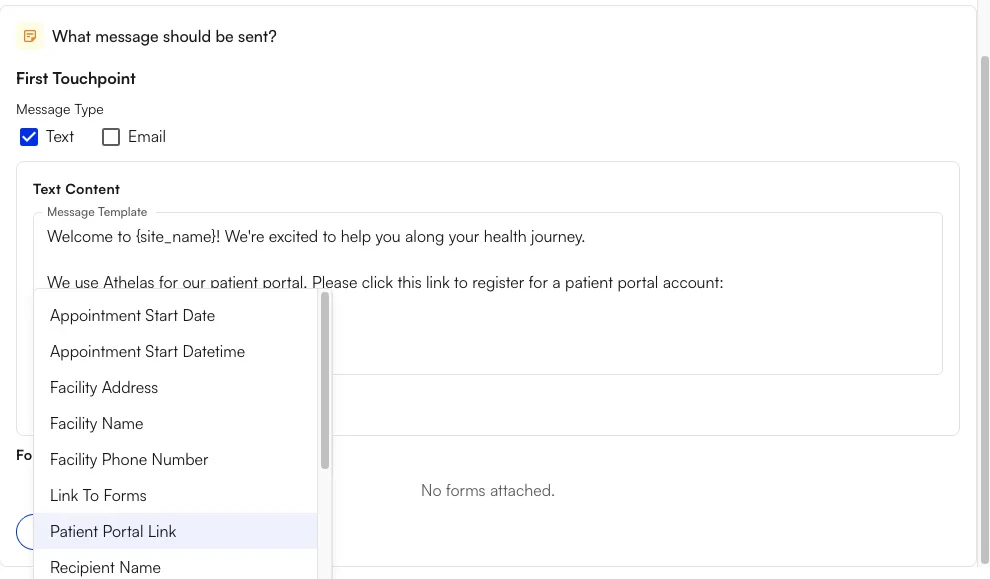
In Outreach Flows, insert the message variant patient_portal_link (labeled Patient Portal Link in the variant picker) into an email or SMS. Use it any time you want to send patients to the practice’s portal entry — for example, reminders to book, pay, or message the clinic.
To set up an individual as an authorized user of a patient’s portal — such as a guarantor or power of attorney — create a new Related Person:
Navigate to the Patient Demographics page, then to Responsible Parties.
Click the Related Persons tab, then + Related Person.
Fill out the required fields for the authorized user, including their relation to the patient and a valid email.
Toggle Authorized Representative to ON, then confirm that you are providing patient portal access to that individual.
Click Create to save the Related Person.
The authorized representative then receives a link inviting them to create their own portal account to access the patient’s information as an authorized representative.
Patients can also generate their own registration link through a self-service link. This is a site-specific link that practices can embed on their website, attach to a QR code at the front desk, or share in other places.To create a self-service registration link, first create a site slug in the Online Scheduling section of the Portal Configs page.After creating a slug, direct patients to the link below:
From here, patients enter their name and date of birth. If the information matches an existing patient at the practice, a new registration link is sent to the email on file.
If multiple patient records share the same email address on file — for instance, spouses on a shared family account, or a single patient who visits multiple Athelas practices — the Patient Portal can link multiple portal accounts to a single login. New registrants are informed that they share an email with an existing portal user, and are asked to acknowledge that their account and information can be accessed by anyone who logs in with that email.If preferred, the new patient can choose a different email, which then writes back to their patient profile in Athelas.
Once registered, patients can access the portal from portal.athelas.com directly, or from portal links sent by the practice through Patient Workflows or Outreach Flows.From the landing page, patients enter their email and password.
Patients can also sign in with Google. From the sign-in page, selecting Continue with Google lets them authenticate with a Google account whose email matches the one on file — no separate portal password required.
When multiple patient accounts or authorized-representative accounts are associated with a single login (for example, a patient who visits multiple Athelas practices), the patient is greeted at sign-in with a selection screen to choose which site portal or patient to access. From there, they are taken into the portal.
Secure messaging between the patient and users from the practice. Users can attach files or send messages.Practices can configure whether patients can initiate messaging directly from their portal, or whether conversations must be started by a staff member. When patient-initiated messaging is enabled, practices can also restrict who patients are allowed to message:
Patient Portal settings live under EHR Preferences. Available-slot display is configured on the Calendar tab; the remaining portal settings live on the Portal Configs tab.
There are two modes for showing available times in the portal: Calendar Interval and Appointment Type. Configure this under EHR Preferences → Calendar tab.The two modes display available timeslots differently:
Calendar Interval offers times on every interval based on the calendar interval for the site or facility.
For example, if the calendar interval is set to 15 minutes, patients see 9:00am, 9:15am, 9:30am, 9:45am, and so on as available times to book.
Appointment Type offers times by iterating on the selected appointment type’s duration, starting from the provider’s working-hour start time.
For example, if a provider starts at 9:00am and the patient has selected a 45-minute Initial Evaluation, they see 9:00am, 9:45am, 10:30am, 11:15am, and so on as available times to book.
Require approval on appointment requests — When on, requests from the portal appear as Requested on the calendar and can be approved from the Requests tab. When off, requests from the portal book directly to the calendar.
Practices can configure whether patients can initiate messages from the portal. When turned off, patients can only respond to messages started by a staff member. When enabled, practices can choose who patients are allowed to message: